ADVERTISEMENT
- Heat the Milk: Pour the milk into a large saucepan and slowly bring it to a simmer over medium heat. Keep an eye on it to avoid boiling over. The ideal temperature is just before it reaches a boil.
- Add Lemon Juice: Once the milk is hot, add the lemon juice and stir gently. You will see the milk begin to curdle as the acid in the lemon juice reacts with the milk. This separation of curds and whey is exactly what you’re looking for.
- Let It Sit: Remove the pan from the heat and let it sit undisturbed for about 10 minutes. During this time, the curds will further separate from the whey, becoming more solid.
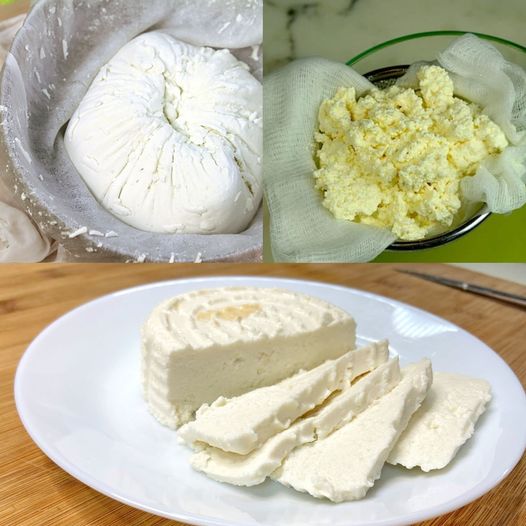
- Strain the Curds: Line a colander with a few layers of cheesecloth and place it over a large bowl to catch the whey (which you can save for other recipes if you like). Carefully pour the mixture into the colander, allowing the whey to drain away and the curds to collect in the cheesecloth.
- Press the Cheese: Gather the corners of the cheesecloth and gently squeeze out the excess whey. Be careful not to press too hard, as the cheese can become too dry. For a firmer cheese, place something heavy on top for a few hours to press it down further.
- Season and Enjoy: Unwrap the cheese from the cheesecloth. At this point, you can add a pinch of salt, herbs, or spices to flavor your cheese. Shape it as desired, and it’s ready to enjoy!
Why Homemade?
Homemade cheese has a fresh, pure taste that store-bought versions often can’t match. By making it at home, you ensure there are no preservatives or artificial ingredients. Plus, it’s incredibly satisfying to create something so delightful from such simple ingredients.
This cheese is fantastic spread on crackers, crumbled over salads, or melted into a variety of dishes. It’s a testament to the beauty of homemade simplicity. Give this recipe a try, and you might find yourself making it a regular activity in your kitchen!
ADVERTISEMENT
Pages: 1 2
